
Hardware Specifications
| Vendor | Nokia |
| Model | XS-010X-Q |
| ODM | CIG |
| ODM Product Code | XG-99YF |
| Chipset | Cortina CA8271A |
| Manufacter | CIG |
| Flash | 128MB |
| RAM | 128MB |
| System | Custom Linux by Cortina (Saturn SDK) based on Kernel 4.4 |
| 10GBaseT | Yes |
| Optics | SC/APC |
| IP address | 192.168.100.1 |
| Web Gui | ✅ Port 80 user: admin, password: 1234 |
| SSH | ✅ (see Enable SSH) |
| Telnet | ✅ Port 23 user: admin, password: 1234 (see Telnet Full Shell) |
| Serial | ✅ |
| Serial baud | 115200 |
| Serial encoding | 8-N-1 |
| Form Factor | ONT |
External/Internal Photo
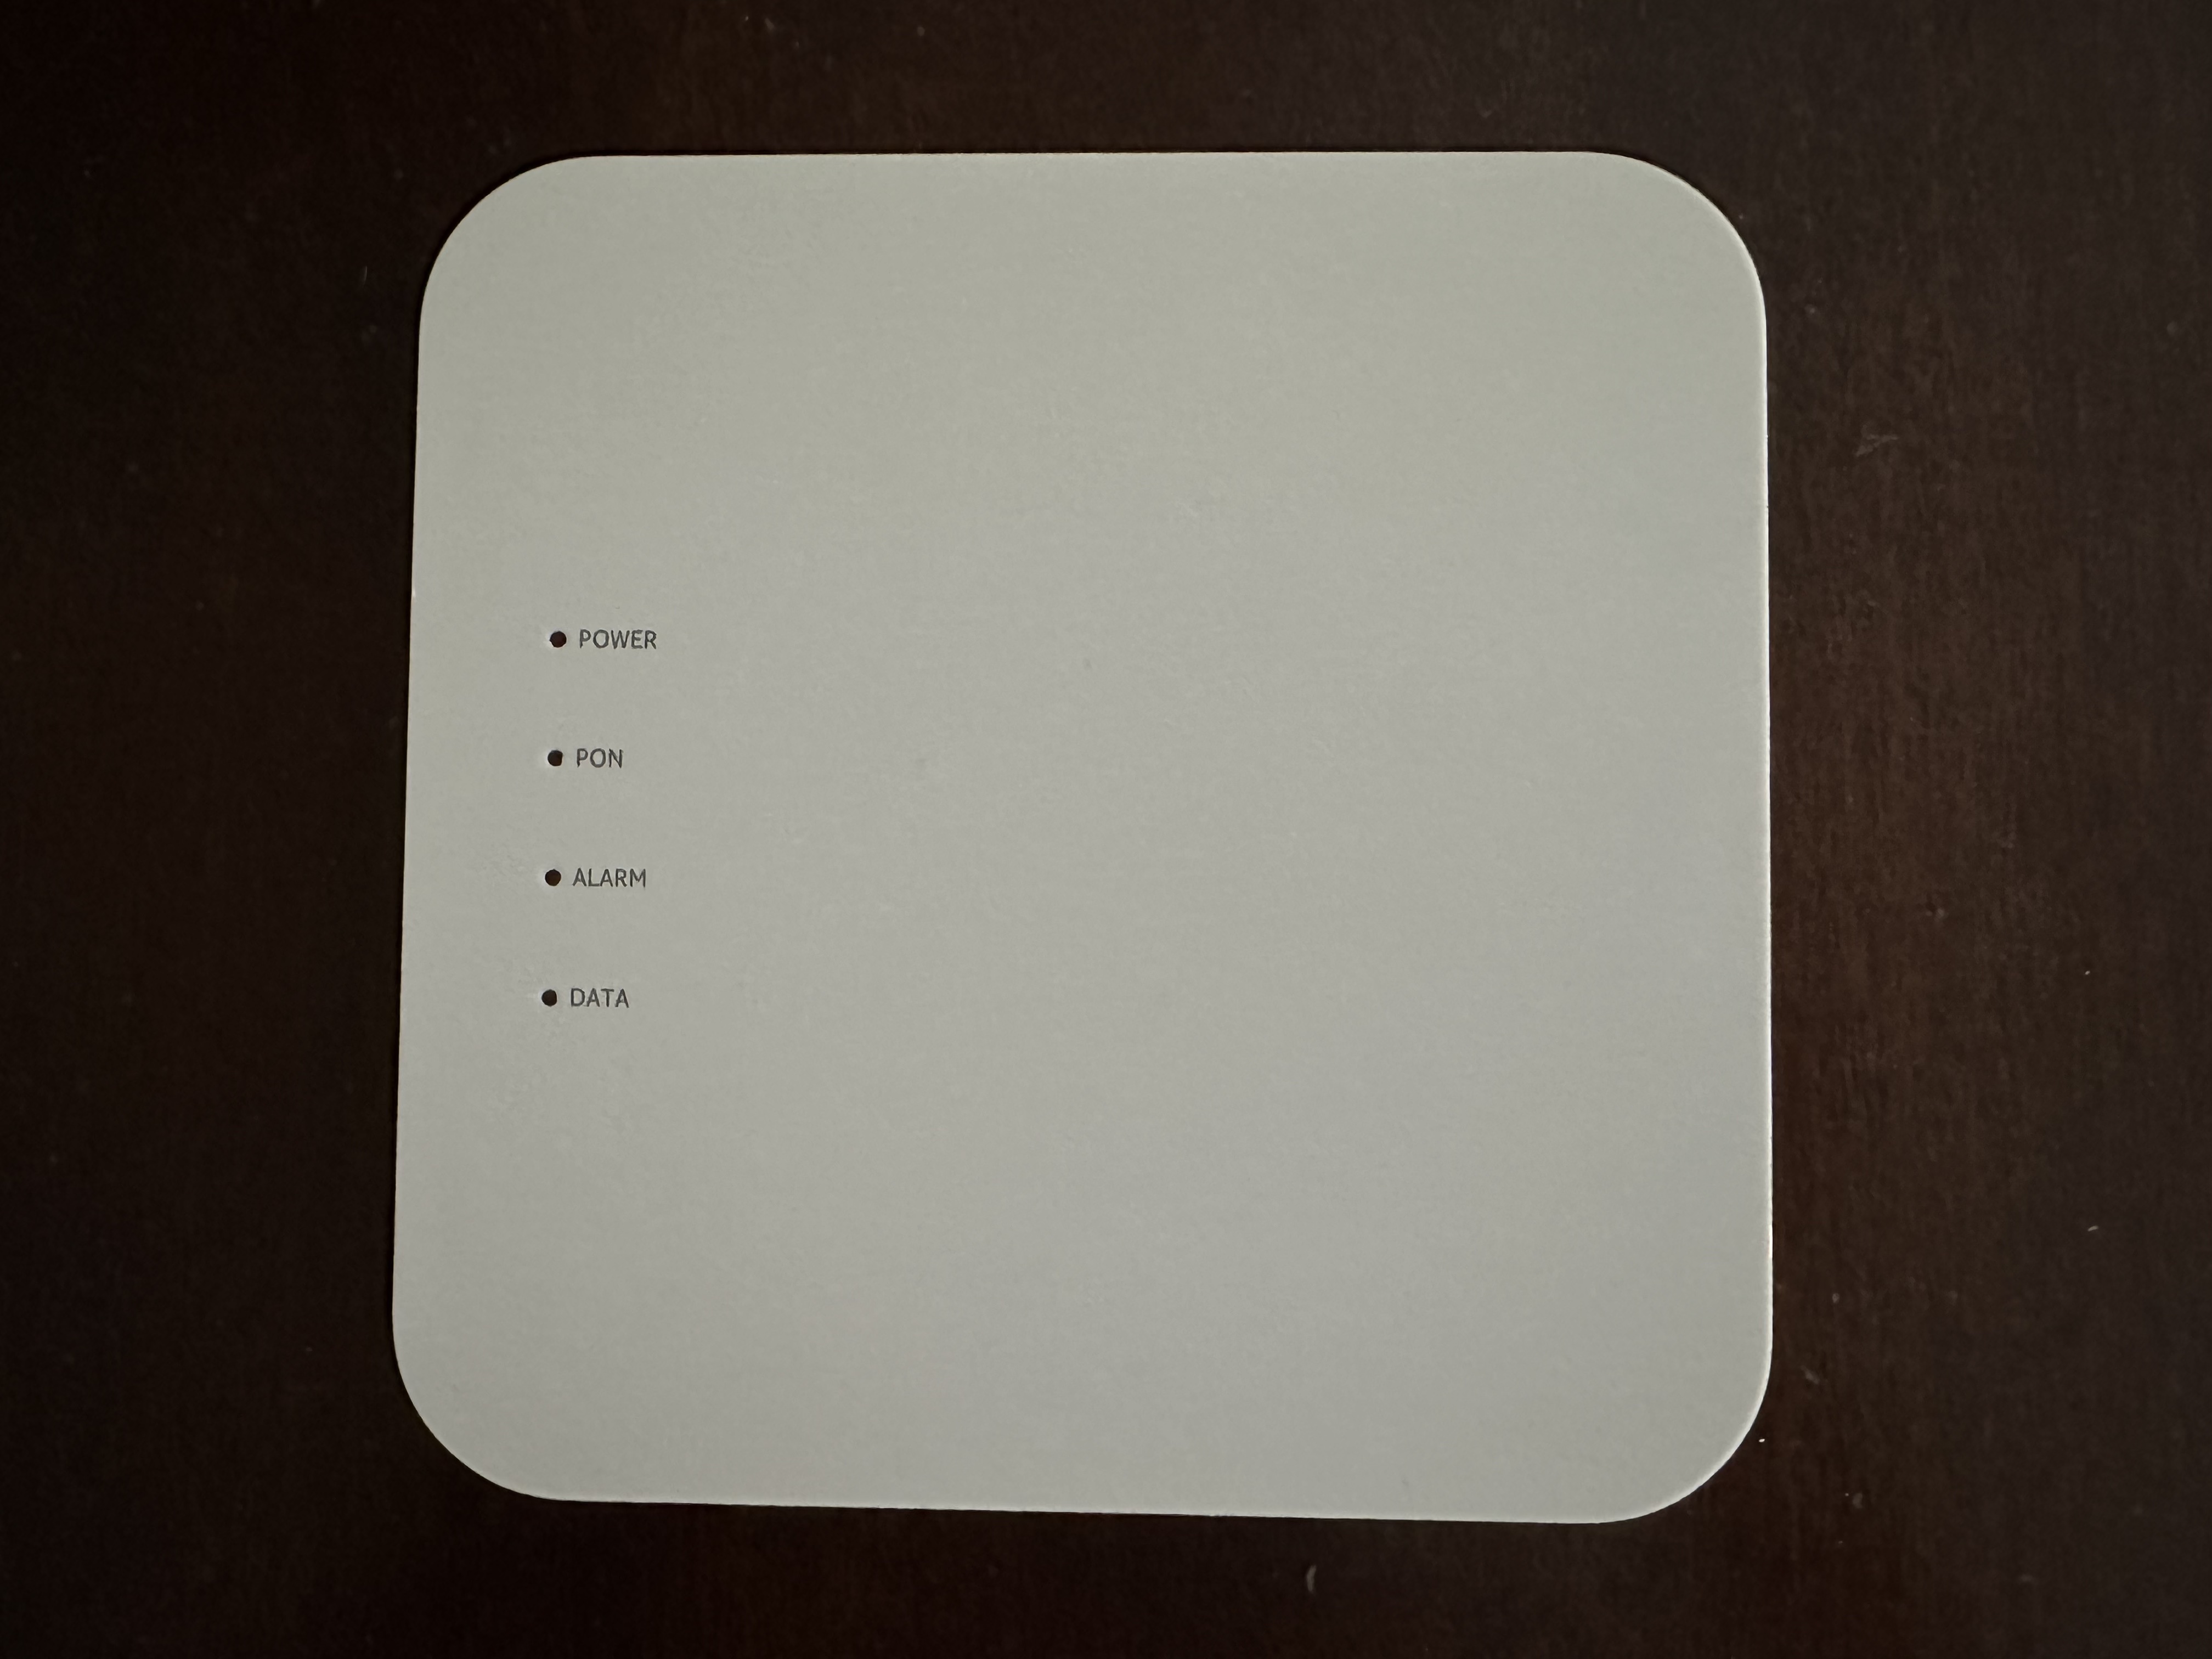
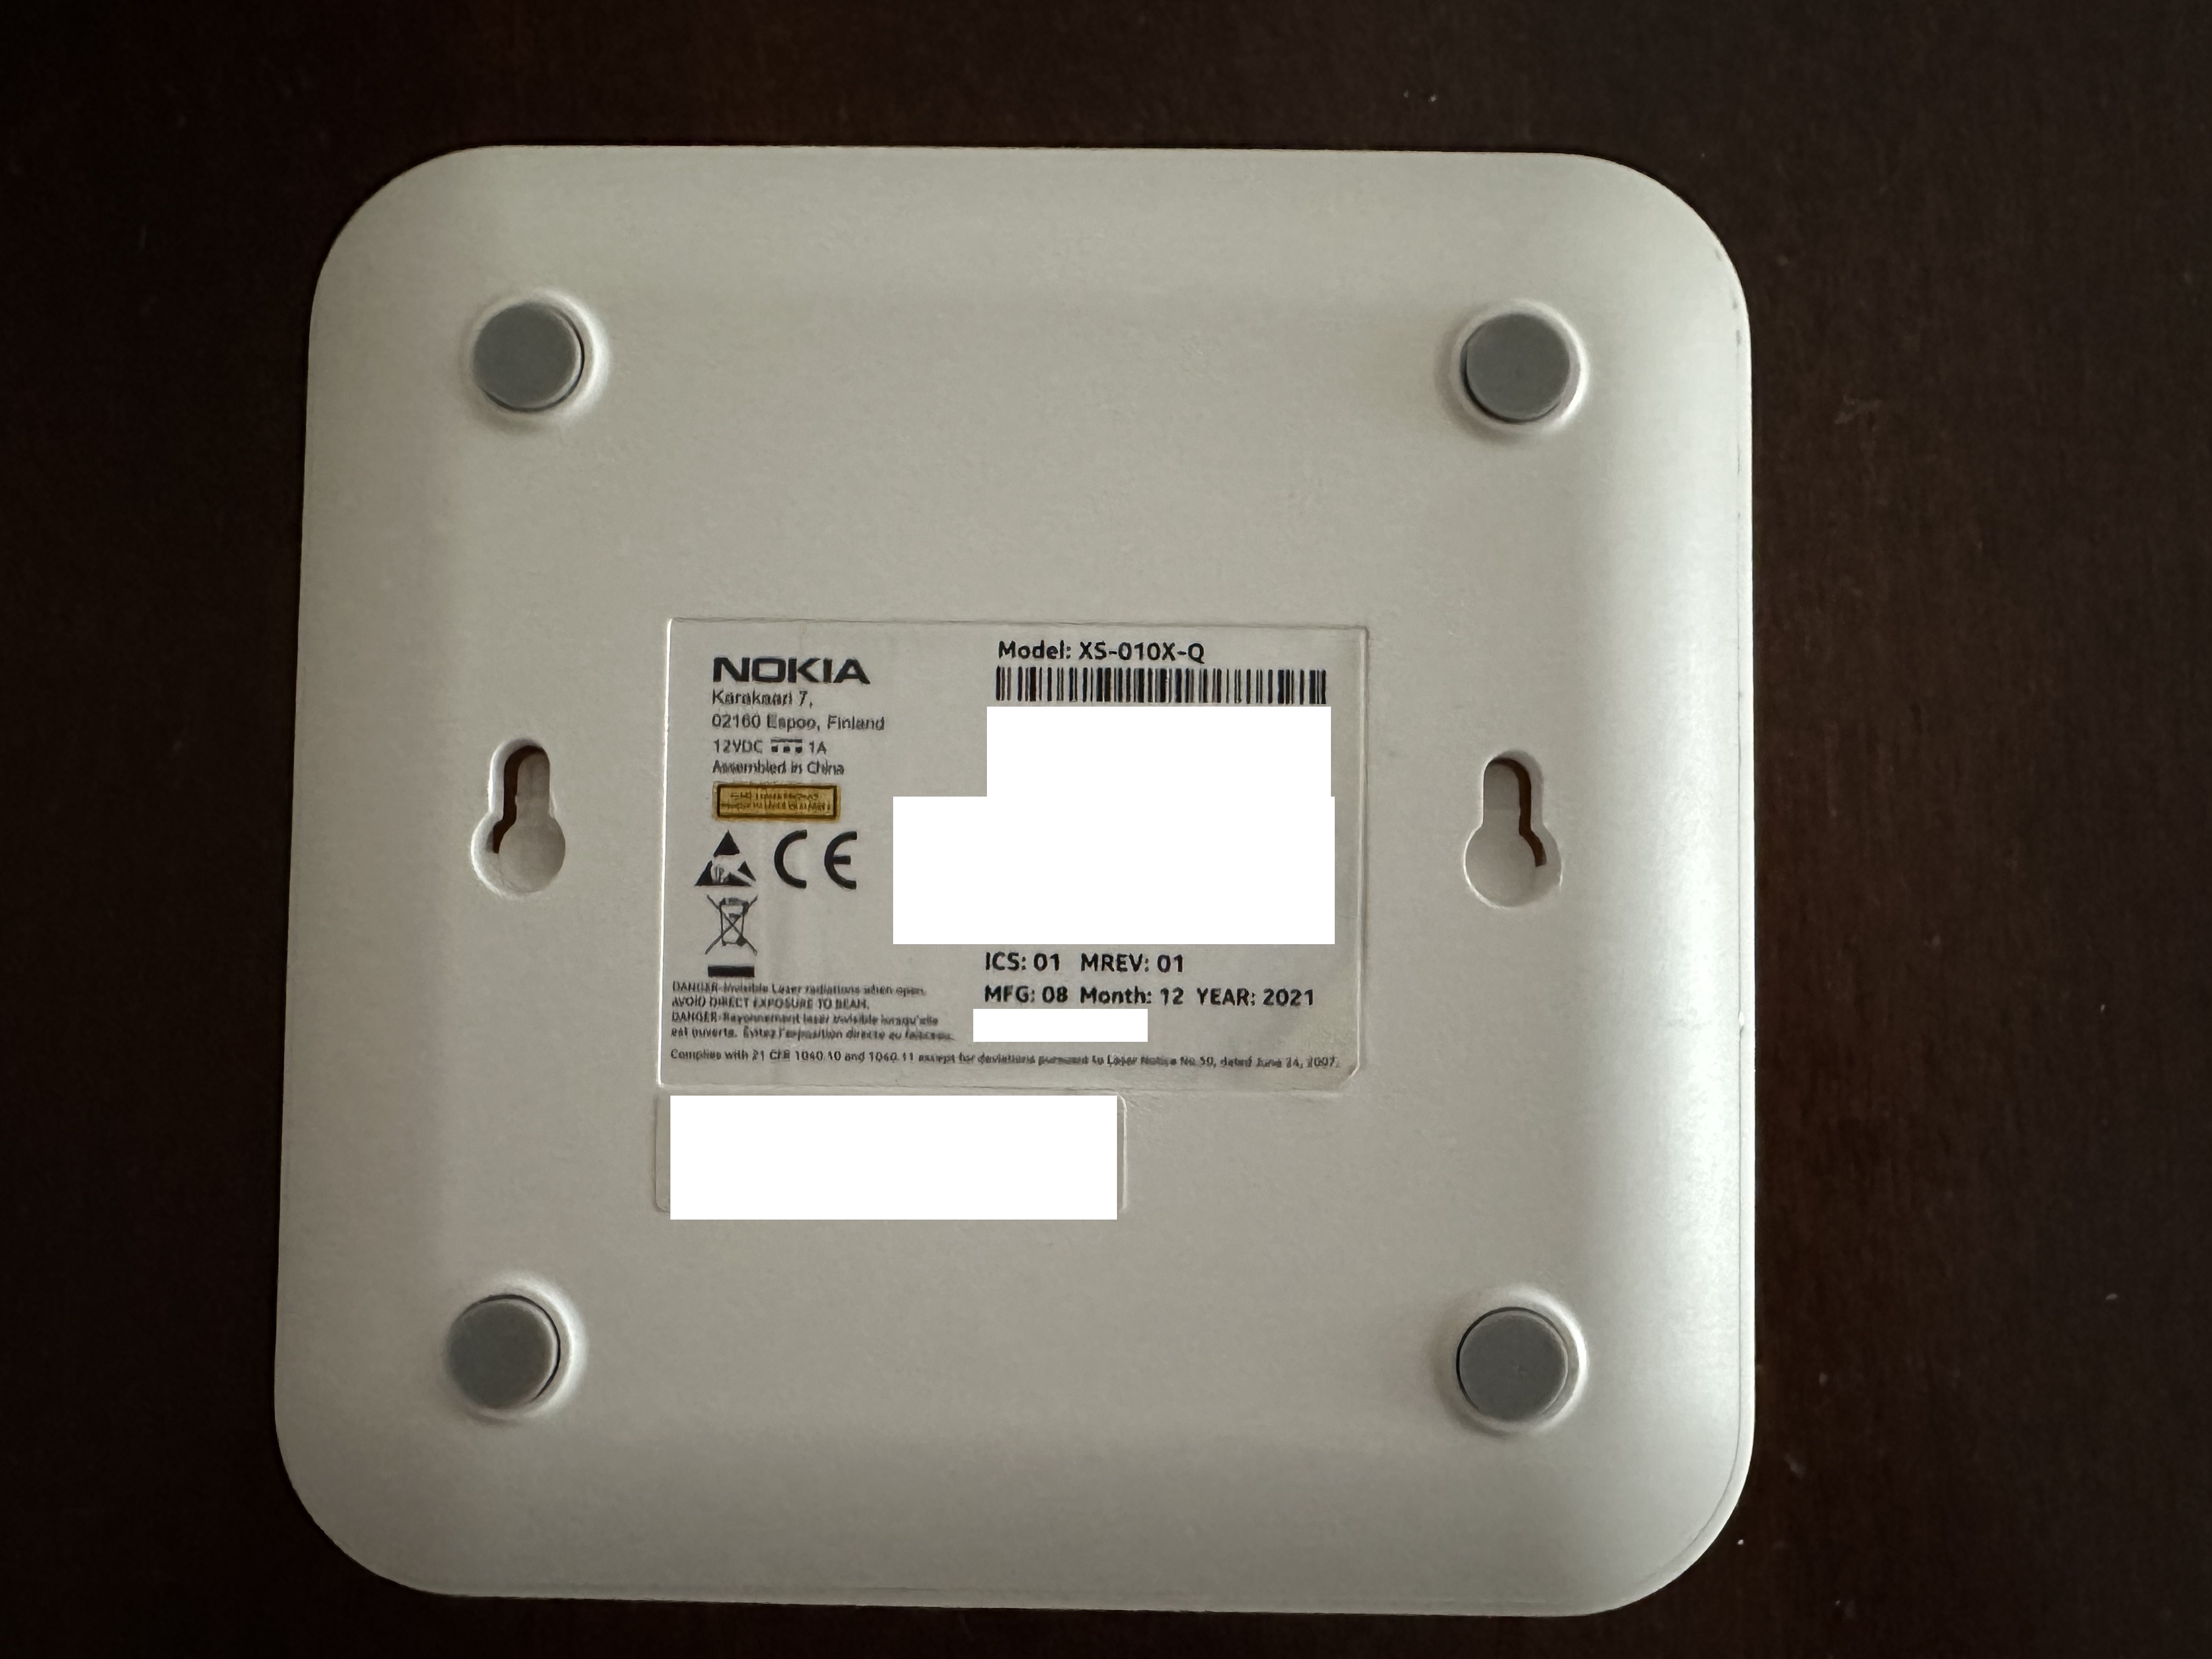
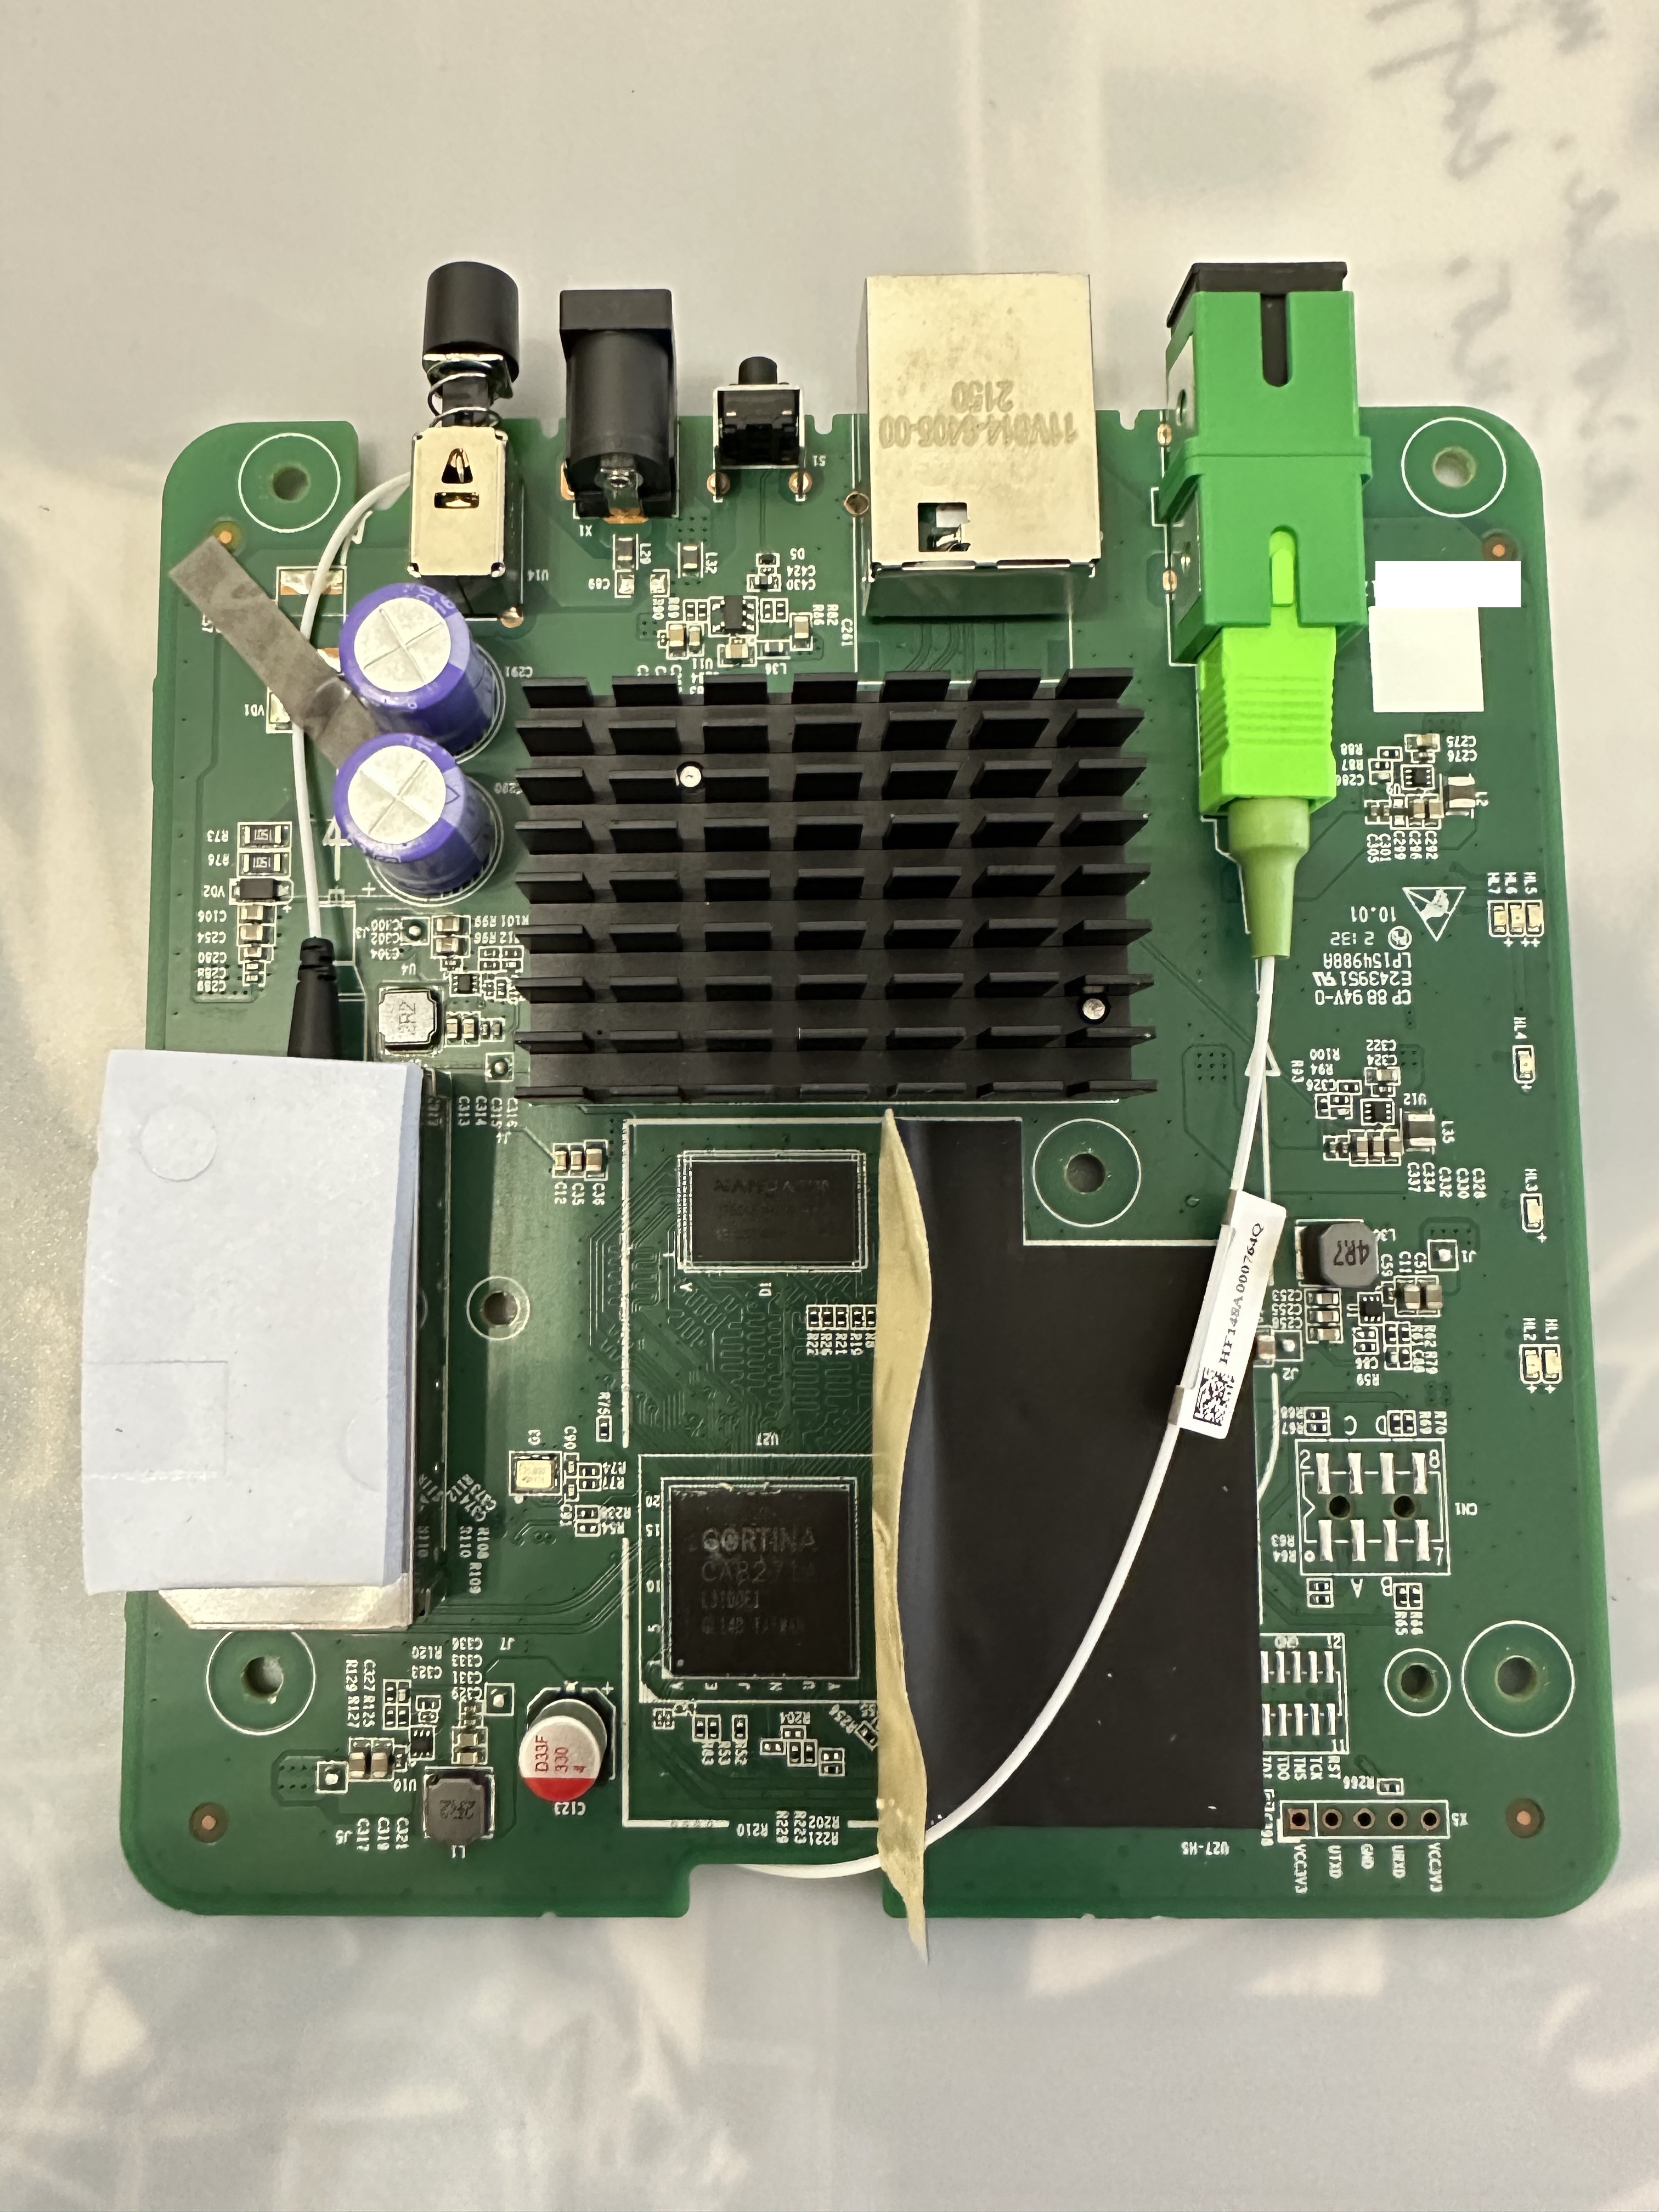
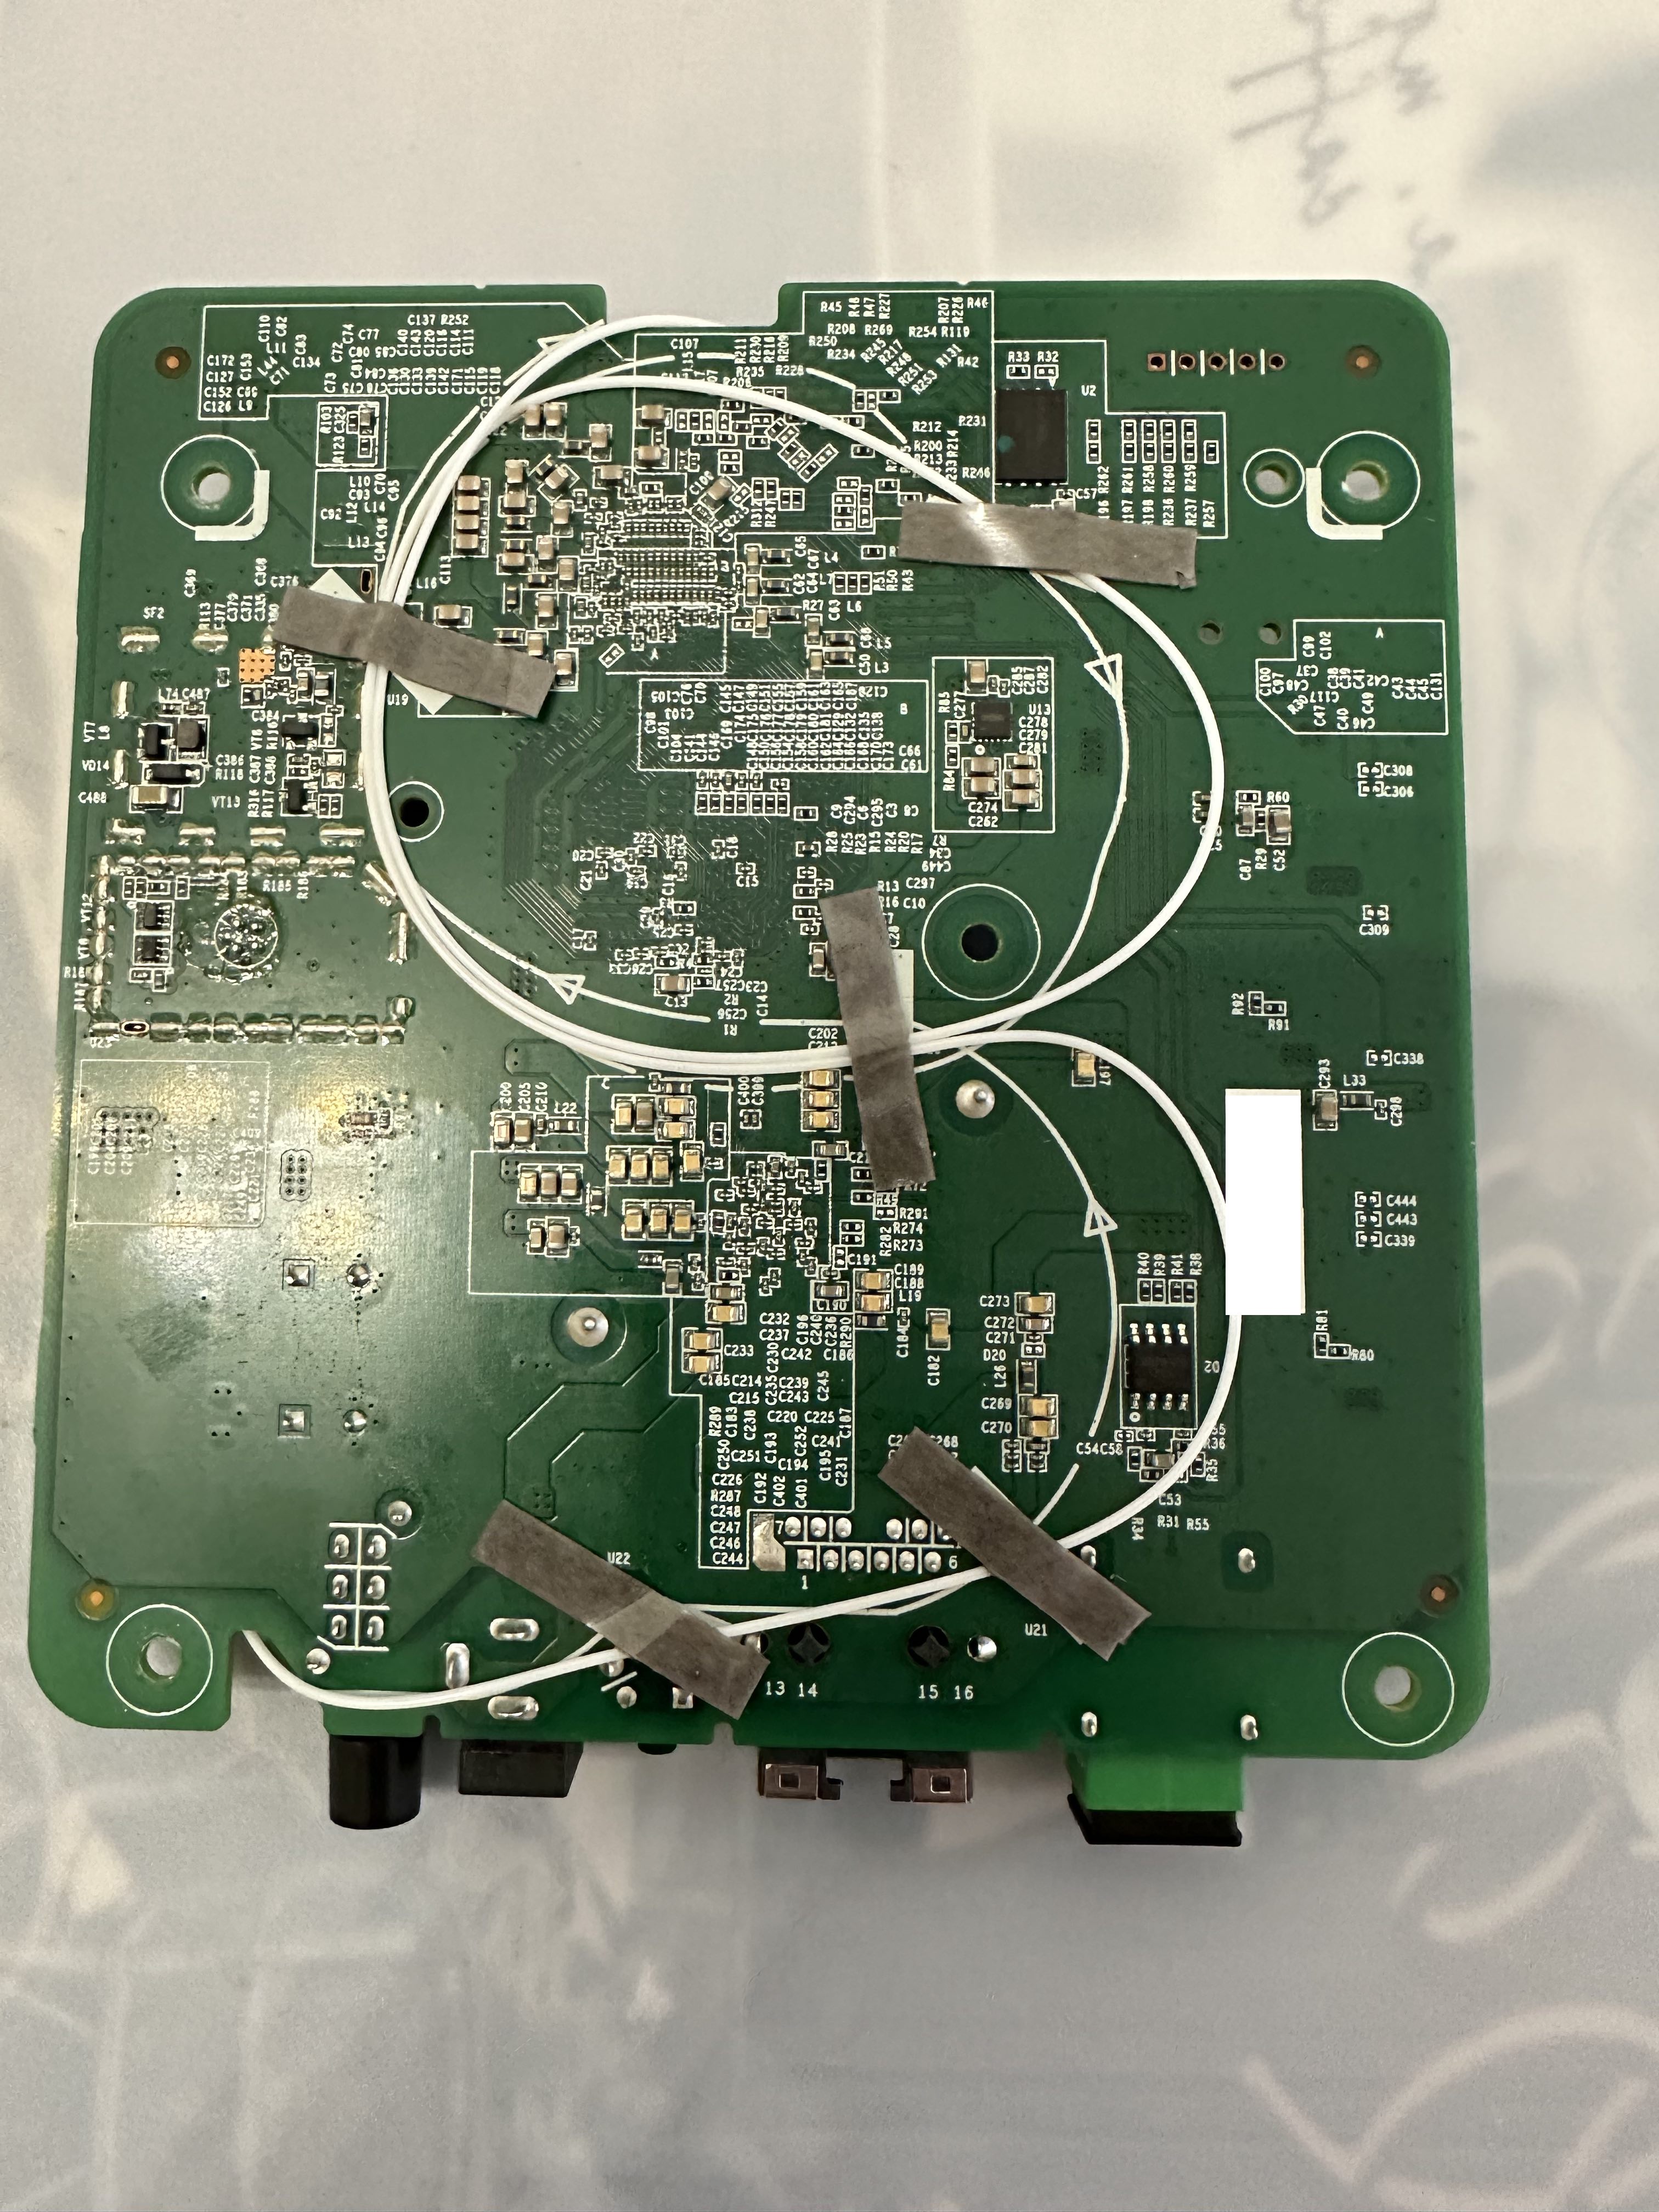
Serial
The ONT has a TTL 3.3v UART console (configured as 115200 8-N-1) that can be accessed from the top surface: it's on the top left of the board, when the Ethernet\Power\Optical ports are facing down. TX, RX and ground pads need to be connected to a USB2TTL adapter supporting 3V3 logic.
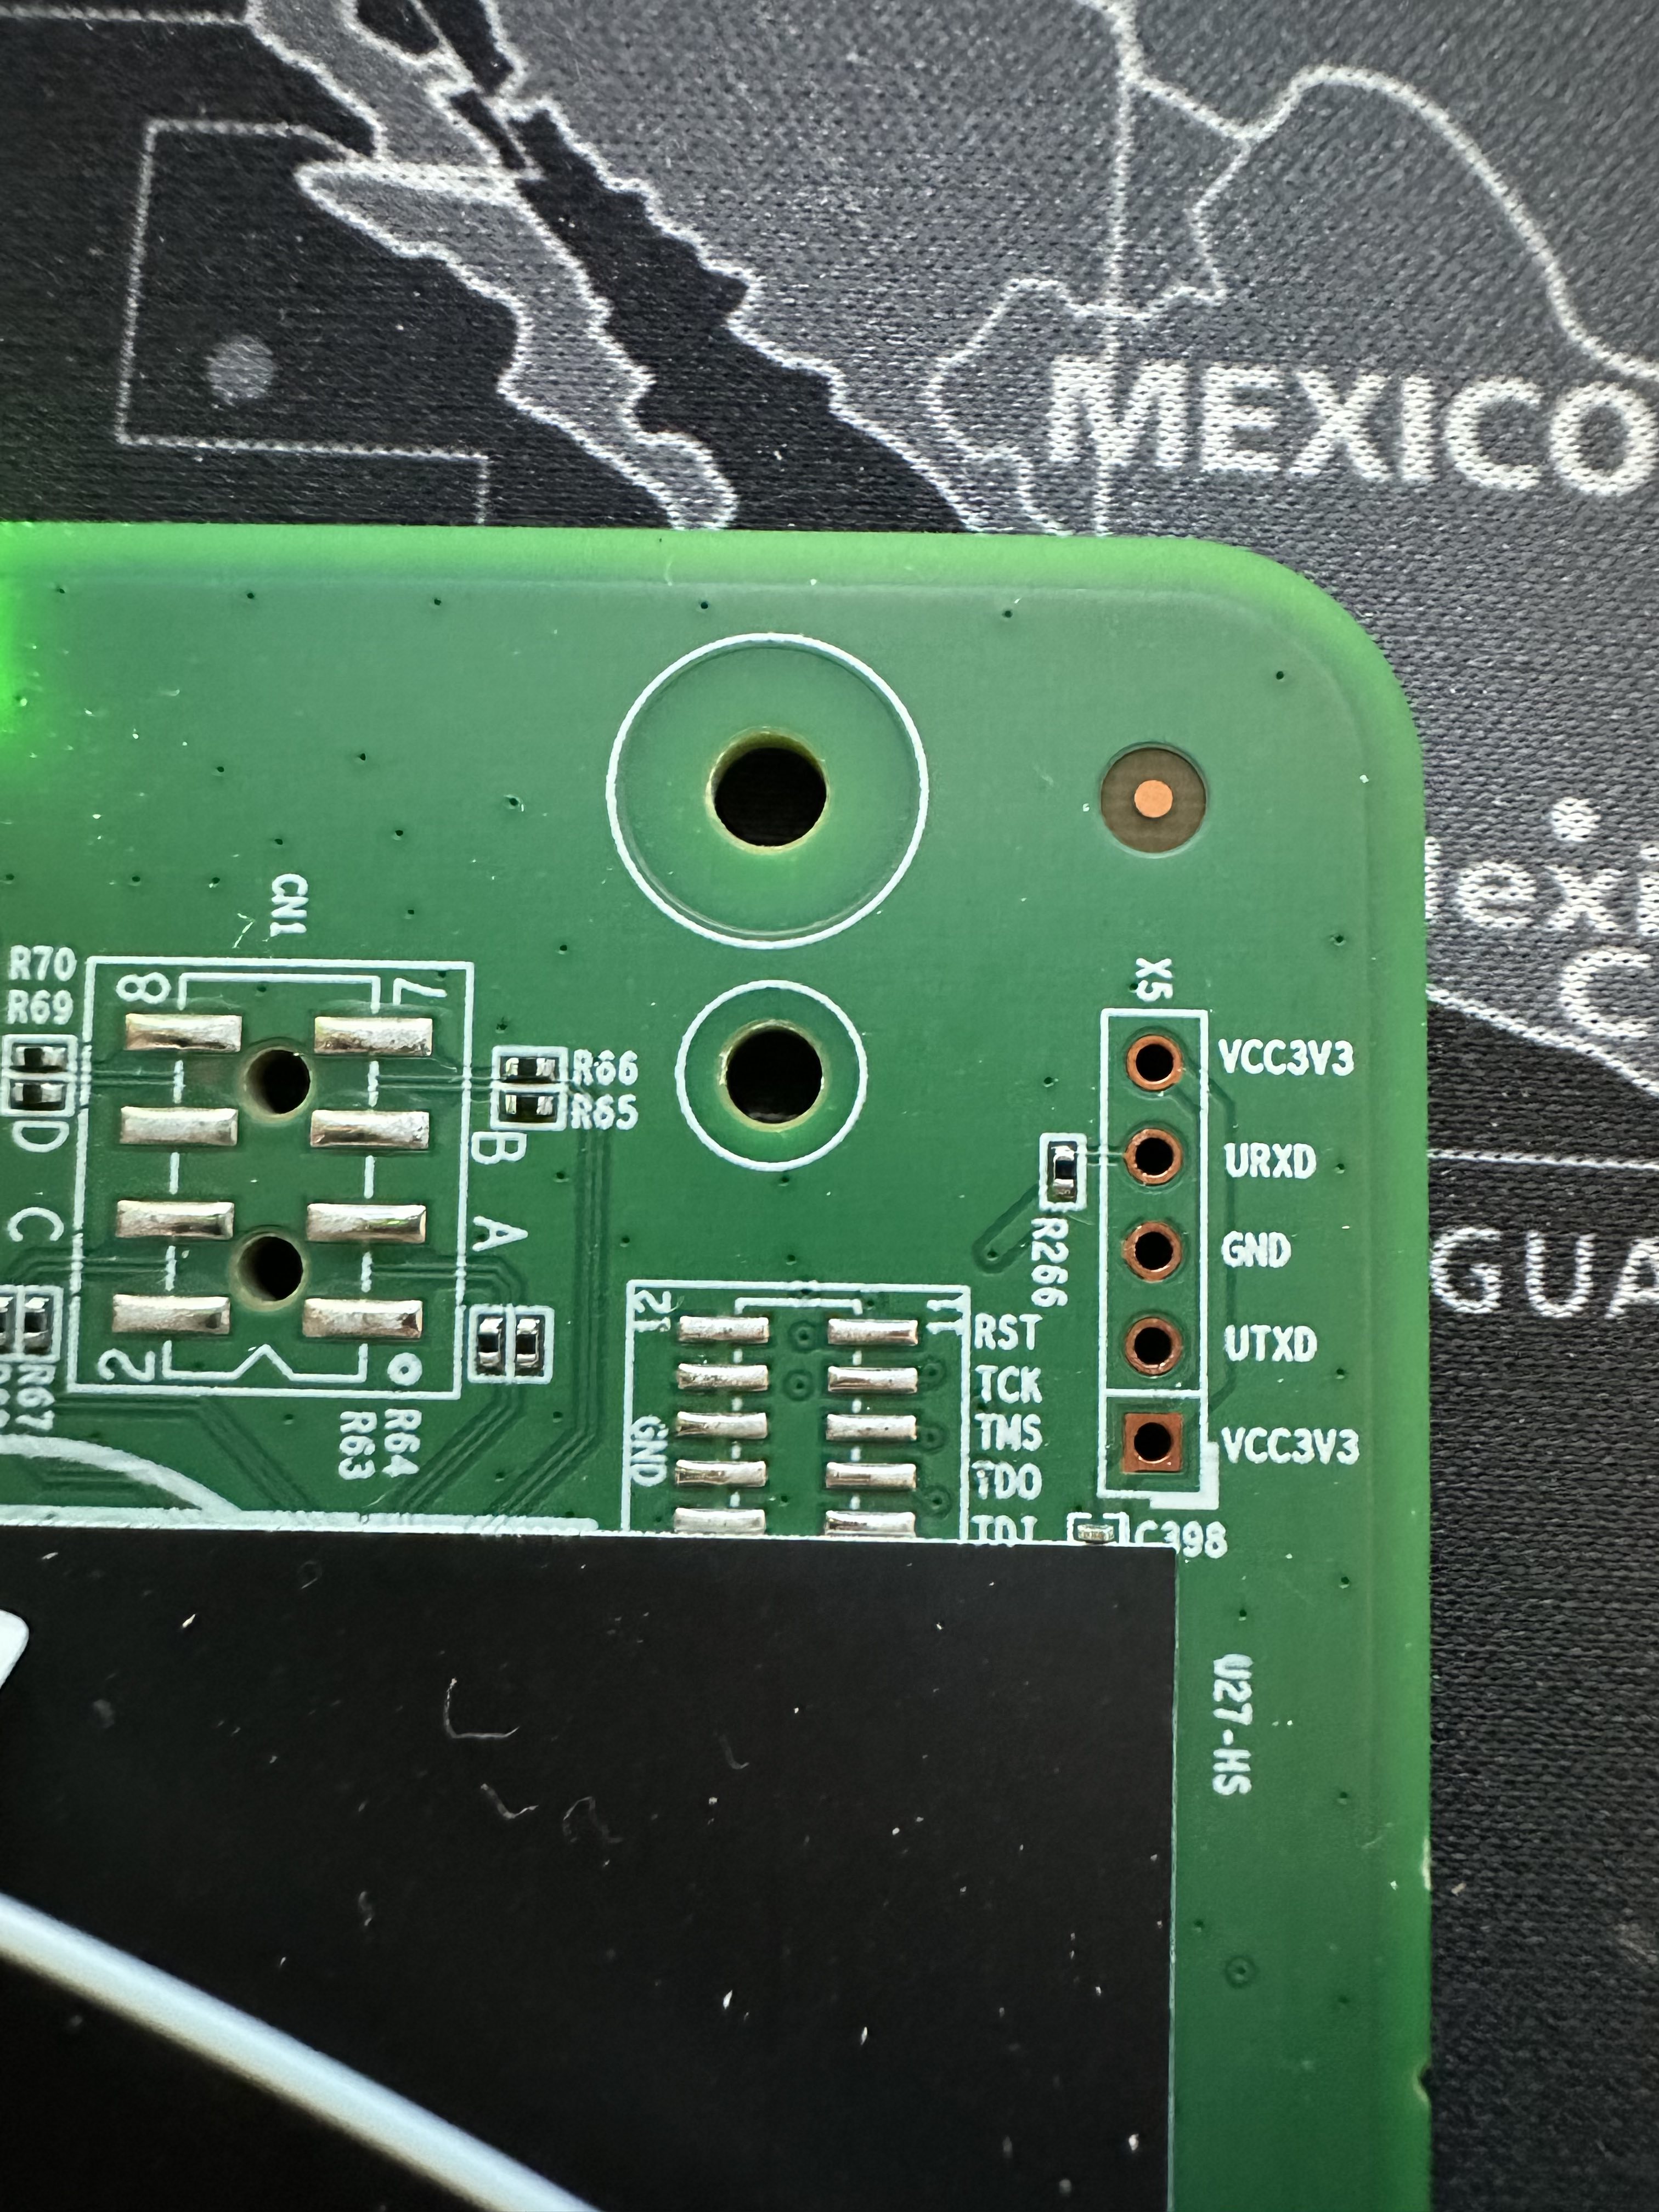
Note
Some USB TTL adapters label TX and RX pins the other way around: try to swap them if the connection doesn't work.
List of software versions
- 3FE49337AOCK80 - (R4.4.17.063 CIG 25/06/2021)
- 3FE49337BOCK28
List of partitions
| dev | size | erasesize | name |
|---|---|---|---|
| mtd0 | 00040000 | 00020000 | "ssb" |
| mtd1 | 00100000 | 00020000 | "uboot-env" |
| mtd2 | 00100000 | 00020000 | "dtb0" |
| mtd3 | 00600000 | 00020000 | "kernel0" |
| mtd4 | 02800000 | 00020000 | "rootfs0" |
| mtd5 | 00100000 | 00020000 | "dtb1" |
| mtd6 | 00600000 | 00020000 | "kernel1" |
| mtd7 | 02800000 | 00020000 | "rootfs1" |
| mtd8 | 01400000 | 00020000 | "userdata" |
| mtd9 | 00100000 | 00020000 | "mfginfo1" |
| mtd10 | 00100000 | 00020000 | "mfginfo2" |
| mtd11 | 00001000 | 00001000 | "uboot-env2" |
| mtd12 | 00b09000 | 0001f000 | "squashfs_ubi" |
| mtd13 | 01078000 | 0001f000 | "userdata" |
| mtd14 | 00b09000 | 0001f000 | "squashfs_ubi" |
This ONT supports dual boot.
kernel0 and rootfs0 respectively contain the kernel and firmware of the first image, kernel1 and rootfs1 the kernel and firmware of the second one.
Usage
Login and enable
Once you're logged in, a custom menu will be shown and you'll be able to access the linux shell by first typing system followed by shell:
ONT>enable
#ONT>login
User name:ONTUSER
Password: ****
The enable password can be generated using the following form:
Access Full Shell
To access a complete linux shell just type:
#ONT>system
#ONT/system>shell
To exit the shell and reach the parent menu type exit or x, in each menu the help command will show how to use the shell
GPON ONU status
Getting the operational status of the ONU
#ONT>traffic
#ONT/system>pon
#ONT/system/pon>show link

 ----------------- LINK STATE -----------------
 Link State:              ACTIVE
 Operation State Machine: OPERATION (O5)
 ----------------- STATE  END -----------------
Querying a particular OMCI ME
#ONT>system
#ONT/system>mib
#ONT/system/mib>show 256
Table Ontg, Ont-g, total 1 instances

EntityID                  = 0x0000
VID                       = "ALCL"
Version                   = AA BB CC DD EE FF 11 22 33 44 55 66 00 00
SerialNum                 = AA BB CC DD EE FF 11 22
TraffMgtOpt               = 0
AtmCCOpt                  = 0
BatteryBack               = 1
AdminState                = 0
OpState                   = 0
OnuSurvivalTime           = 0
Loid                      = ""
Password                  = ""
AuthState                 = 0
OntState                  = 1
GPON/OMCI settings
Committing changes to the OMCI MIB tables for GPON operation
#ONT>system
#ONT/system>mib
#ONT/system/mib>reset
Getting/Setting ONU GPON Serial Number
#ONT>system
#ONT/system>misc
#ONT/system/misc>eqsn set "ALCL00000001"
---ATECMDRESULT--- OK
#ONT/system/misc>eqsn get
eqsn: ALCL00000001
---ATECMDRESULT--- OK
Getting/Setting PLOAM
#ONT>system
#ONT/system>misc
#ONT/system/misc>pon_passwd set "123456789"
---ATECMDRESULT--- OK
#ONT/system/misc>pon_passwd get
pon_passwd: 31323334353637383900
---ATECMDRESULT--- OK
#ONT/system/misc>register_id set "123456789"
---ATECMDRESULT--- OK
#ONT/system/misc>register_id get
pon_passwd: 31323334353637383900
---ATECMDRESULT--- OK
Setting OMCI software version (ME 7)
# echo SWVER=3FE49337AOCK80 > /mnt/rwdir/sys.cfgGetting/Setting OMCI hardware version (ME 256)
#ONT>system
#ONT/system>misc
#ONT/system/misc>eqvid get
eqvid: 3FE45458ABAA06
hex_eqvid: 0x3346453435343538414241413036
---ATECMDRESULT--- OK
#ONT/system/misc>eqvid set "YOUR_CUSTOM_VID"
Getting/Setting OMCI vendor ID (ME 256)
#ONT>system
#ONT/system>misc
#ONT/system/misc>vendor get
vendor: ALCL
---ATECMDRESULT--- OK
#ONT/system/misc>vendor set "ALCL"
---ATECMDRESULT--- OK
Getting/Setting OMCI equipment ID (ME 257)
#ONT>system
#ONT/system>misc
#ONT/system/misc>eqid set "YOUR_CUSTOM_EQUID"
---ATECMDRESULT--- OK
#ONT/system/misc>eqid get
eqid: YOUR_CUSTOM_EQUID
hex_eqid: 0x594F55525F435553544F4D5F4551554944000000000000
---ATECMDRESULT--- OK
Advanced settings
Setting management IP
#ONT>system
#ONT/system>misc
#ONT/system/misc>admin_ip get
admin_ip: 192.168.100.1
---ATECMDRESULT--- OK
#ONT/system/misc>admin_ip set 192.168.1.1
#ONT/system/misc>admin_mask get
admin_mask: 255.255.255.0
---ATECMDRESULT--- OK
#ONT/system/misc>admin_mask set 255.255.255.0
Enable SSH (not persistent)
Port 22 is filtered by default and the SSH daemon can be only enabled in runtime. Here is the procedure but it's not persistent and will need to be done again after each reboot:
Access UART with ONTUSER, then enter system\misc.
Set ssh_en to 1 with the command:
#ONT>system
#ONT/system>misc
#ONT/system/misc>ssh_en set 1
---ATECMDRESULT--- OK
Go back to system, then shell and run this command:
#ONT/system/misc>exit
#ONT/system>shell
#ONT/system/shell>iptables -F
Enable Telnet Full Shell
When using the default credentials to access telnet (admin\1234), the prompt is limited to the GponSLID shell that only permits modifying or displaying the PLOAM password. If you change the admin_mask to 255.255.255.255, default credentials stop working but you can login as ONTUSER using the generated password to have full shell like when using UART.
Here is the procedure to change admin_mask:
Access UART with ONTUSER, then enter system\misc.
Set admin_mask to 255.255.255.255 with the command:
#ONT>system
#ONT/system>misc
#ONT/system/misc>admin_mask set 255.255.255.255
normal load eep datat
---ATECMDRESULT--- OK
Now reboot the ONT and you can access telnet with ONTUSER and full power 😃